

How to Fix a Bricked Printer board.(Arduino based)
A few weeks ago I made a huge mistake and bricked my MKS Base, board. I wasn’t happy with some of my firmware settings. I decided to open up the firmware and do a little tweaking. As you probably can guess, things did not go so well. While attempting to find the firmware I somehow lost I accidently loaded a blank sketch. This wasn’t so bad but it did put me on a long path I wasn’t expecting. When I tried uploading a new sketch it wasn’t taking the upload. Somehow I not only wiped the chip but I blew the bootloader off as well. After a few hours of threatening to take a tire iron to the now useless 3d printer and beating my head against the wall. I gave up and ordered a new board.
Then my stubborn streak set in. After another day of Google Foo, I found the answer to my problems and an excuse to finally buy an Arduino. This is actually helpful for a multitude of reasons. First, I can fix my board Second I have a whole new list of projects available to me in the future and Third I can use this when I buy a board and it arrives bricked which has been known to happen. Nine times out of Ten when you get a dead board it just slipped through the factory without receiving a bootloader.I’m going to make this as easy to follow as possible. This is a skill that once you learn it, you can do all kinds of DIY projects. Like, make your own Arduino from scratch. some of the steps are a little different but very easily done.
Gather your Arduino and materials.
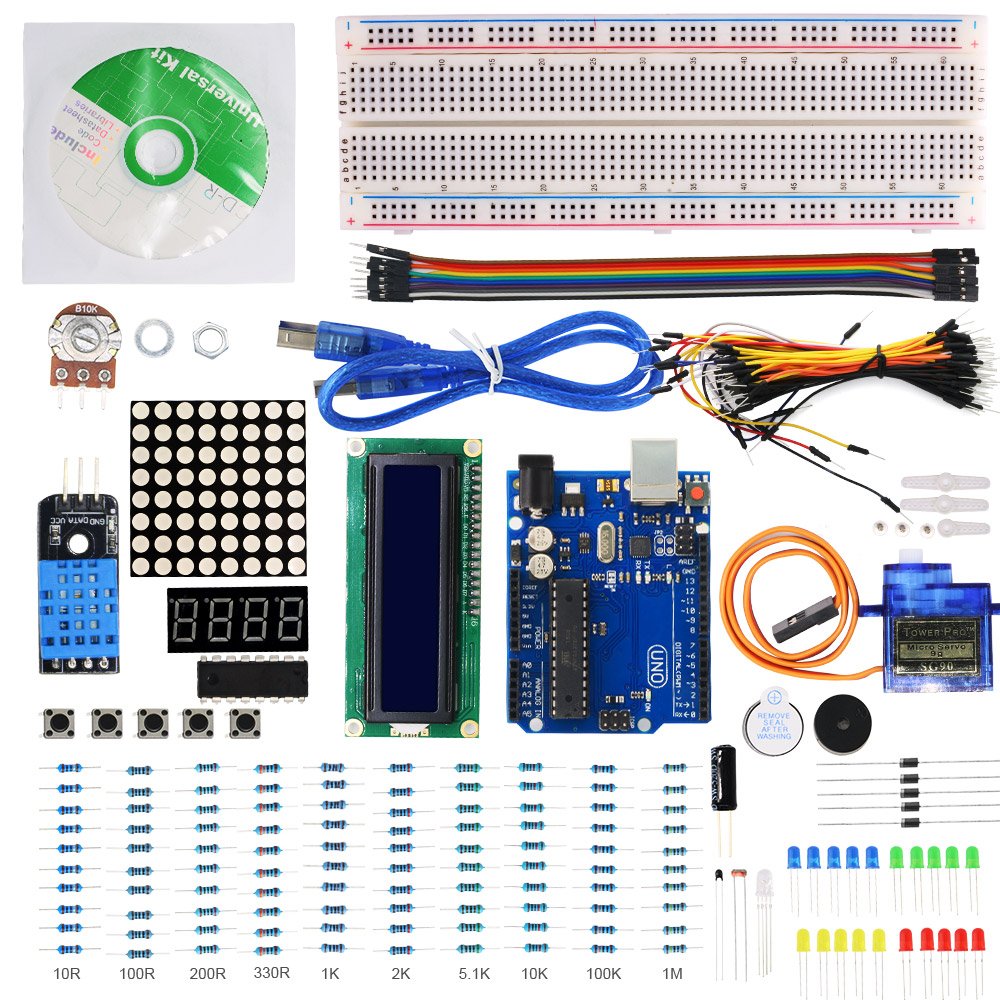
The main thing you will need is an Arduino. I suggest buying a kit if you don’t already have one. That way you have all the pin connectors and breadboards you might need. Any Arduino will do as long as it has a bootloader already. After you get an Arduino your going to want to pull your driver board off the printer. trust me it will be easier than trying to fix it while it’s still attached.
Wire it up.
There are quite a few ways the wiring can be done. To make it as easy as possible I’ll show you how I did it. I had an MKS base board but any Arduino based board will have an ICSP port and as long as the silk screen is done right there will be an ICSP label along with a #1 to tell you where the first pin is. From there the wiring is easy. If you have a 6 pin connector you are set. but if not the wiring is a little involved.


This is how you wire them up. All credit goes to Nick Gammon for the info. I’ll show the easiest first but odds are most of us don’t have a 6pin connector.


This is how I wired it up.I didn’t have any female to female connectors so I pinned the male ends to the breakout pins on the Arduino. Everything is the same they are just in alternate spots.


The wiring is very straight forward if you follow the link to Nick Gammon’s page. In the video down below it will walk you through everything I have shown so far but it’s done on an ATmega chip sitting on a breadboard. All the steps are the same from here on out. When you choose your chip you want to select the ATmega 2560 unless you have a different chip.
Bringing it all together.
From here on out it’s exactly like uploading a Firmware sketch with Arduino’s software. First, you install the sketch from Nick Gammon’s page on the Arduino (not the mks board because it won’t take anything obviously) Then you run the program and you’re done. From here on out I’ll let the video do the talking. If you are familiar with Arduino and how to wire things up you can skip to 7:40 in the video for the programming details. The description in his video also has some other useful links so check them out.
The Less involved way.
I wanted to make sure just about anyone could fix their boards if they got bricked. The above way is sure fire way to program your boards and many other chips. There is another way that some might say is easier but I think it has its own issues. For this purpose, it’s pretty straight forward. Both ways have their pluses and minuses. I chose the former because it gave me an Arduino to play with and because it can be used like any prebuilt programmer. If you just want the job done and don’t want to mess with Arduino the pocket avr is hard to beat and it’s 10$ cheaper. The downside is that after you’re done the avr will end up in your toolbox never to see daylight again. Where the Arduino can be used down the road for something like a CNC machine. The choice is yours.
- Buy an avr programmer. I like Sparkfun’s.
- Download Nick Gammons files.
- Download and install avr firmware and drivers.
- Follow Steps in the video below but choose the ATmega 2560
- Connect the board to your PC and upload a firmware sketch. I have seen people try this and need to flash the bootloader as many as 3 times. This is why I don’t like the avr method. It doesn’t always take the first time. Some people blame the avr others blame the ATmega chips. If it doesn’t take a sketch try reflashing the board.
Same thing but on a Rambo
I hope this helps some of you. It’s not something that happens to many of us but it’s better than buying a new board because of a simple mistake or waiting weeks for a board that was DOA only because it didn’t have a bootloader. It also means you can mod your firmware without worrying about bricking the board. The extremely thrifty could use this to build their own Driver boards for things like CNC or even a 3d printer. Once you know how to install bootloaders on blank chips, Said chips drop in price to pennies on the dollar instead of a couple dollars a chip.
https://www.arduino.cc/en/Tutorial/ArduinoISP
http://forums.reprap.org/read.php?146,531773
https://www.sparkfun.com/products/9825
http://mklec.com/project-kits/kd-circuits
https://github.com/bkibby/OptiLoader
http://www.gammon.com.au/bootloader
How To flash bootloader to your printrboard using an arduino from PrintrBot
Great tips, thanks!
Cheers
Glad you liked it I hope it helps. I know i wish this available a few weeks ago.
Contest! Yay!
Also, nice article 🙂
Seems easy to follow.
Indeed! Good info to know.
just what i needed to do thankyou very much for the write up and info
I’m glad everyone is finding this useful.
Thanks! This fixed one of my broken boards
The fact that it halped keeps me looking for more things like this.
Very well-written article with a lot of good information! Thank you for taking the time to share this with us all.
Thanks, that’s great
good
Very informative, this sort of stuff can get overwhelming but this explained everything very clearly.
Contest!
Nice article.
Very usefull information.
Thanks for the useful article!
Great info, Thanks!
Good to know!
Great info which could really help someone out of a difficult situation.
Peace!
I will definitely be bookmarking this for future reference. Well laid out and informative.
While I followed most of this there were a lot of terms I hadn’t come across before and coming into a random article made it harder to understand. Maybe you could link some terms to a common glossary?
I would be happy to adjust the post a little. What terms were having trouble with?
Excellent article!
Super informative! It reminds me of when I had a habit of bricking routers haha. Thankfully there’s usually a solution to recover them now days, it’s much easier.
Very informative!
The possibilities are endless and this article is so interesting that it proves to me technology just keeps leaping ahead and improving faster then I can keep up
Thanks for the info – hope I never need it!
Excellent guide, thanks!
Superb Guid, thank you!
Wow!! What an awesomely thorough article. Well done on getting all this information down.
I will probably use this eventually as I am not good at keeping tech alive.
This seems very complicated for a beginner, but I would give er a try.
Very interesting! I’ve done something similar, but I look forward to trying this
Seems very helpful!
thank you for doing such a detailed tutorial on how to do this
Nice writeup
Really Cool Help!!!
absolutely a must know article. I will save this and remember it in worst case szenario 😀
Would this work with the i3 Duplicator?
I can’t say for sure but it is an atmega chip and it does have an ISCP port as shown by the circute diagram. Assuming your I3 still uses the Melzi board of course.
Processor: ATMEGA1284P
http://reprap.org/wiki/Melzi
If it is already bricked you can’t brick it more. When you get to the bootloader install just pick the correct processor for the board and you should be fine. If the board isn’t bricked i wouldn’t mess with it.
Let me know it this helps
Great tutorial, think it’s a bit too advanced for me but I will pass on to my husband!
I’m definitely bookmarking this. I’m sure it will happen to me someday!
Very Helpful.
Might try buying a bricked printer cheap and try this to fix it
thanks for the info. could come in handy in the future. if need be.
I totally need this – glad for the info, came right on time too. Will post how it went for me
Having the right tools can make a lot of difference. I hope you fare as well as I did.
Woooh
Looks techie but easy at the same time.
Cheers!
This would be very helpful even for a relative tech newbie
I tried to make it as easy to follow as possible.
I usually have good luck keeping my tech going, but if I ever need to this you’ve laid it all out very well.
This site is such a fantastic source for the 3D printing community. This article is a great example, where else are you going to find as detailed information as this?
Thanks for the tips.
Quite a thorough article and worthy of a re-read
Great article full of knowledge
Good resource. Bookmarked.
ok….there’s a lot to learn for me still….will definitely save this for future reference…cheers!!
Yeah, I would like to construct this. Thanks for the useful and interesting article.
Even if I stayed up for a week and drank a hundred energy drinks…I still wouldn’t be able to wtite an article like this! I am still a beginner when it comes to anything Tech related!
That’s a lot to do and some not very common “materials” to find in any house, but worth the effort to fix it.
Hello Nathan:
I have seen your blog and how to fix the bootloader of a mks-sbase 1.3.
The same thing happened to me and the bootloader was damaged and I need to load it again.
I have followed your instructions and the video, but I have some doubts:
1º) Have you loaded by default in the mks a standard bootloader of a mega 2560? or you have loaded with a special .hex file (like smoothieware has on your github).
2º) I tried to test the connection with dupont cables like you, but when I run the atmega_board-prgrammer of Nick Gammon I get an error in the connection requesting that I check the connection several times, but I get an error and I have checked the connection several times and they are fine.
You can give me a hand. I thank you for your help in advance.
Regards,
Thanks, it’s been great to restore my MKS base 1.5.